Raw data analysis with CI Hex Viewer
Analysis of the raw data is an indispensable part of the process of data recovery and forensic investigation. Data search and analysis on a storage are normally conducted with special software. However, automatic software mechanisms can be insufficient in some complicated data recovery and forensics cases. Thus, the analysis task is passed entirely into hands of the user. |
 |
In this article we give an example of the raw data analysis with the software for hexadecimal viewing and editing – CI Hex Viewer. We analyze the boot sector structure with the purpose to find the MFT for further data recovery. In addition, we give some tips as to software use.
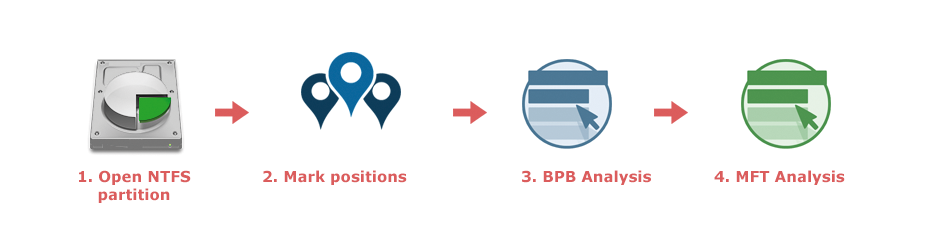

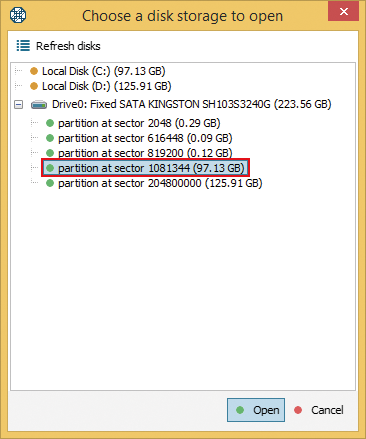
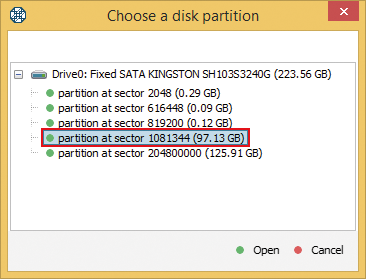
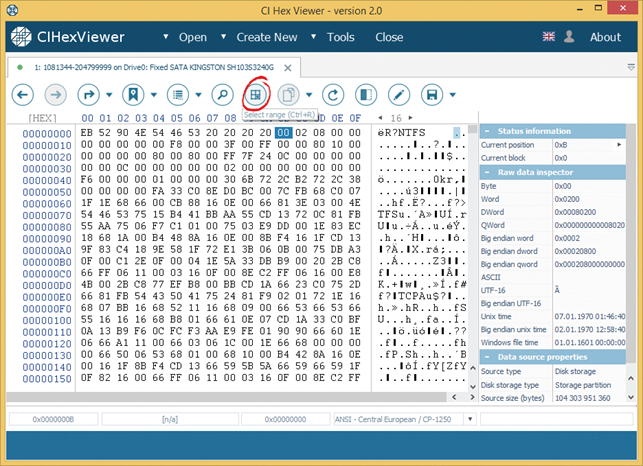
First, we open an NTFS partition in CI Hex Viewer. To do this we press Open, then physical disk and select the NTFS partition from the storages list in the dialog window.


To open a virtual disk choose File from the drop-down list and then open it As a disk image file.
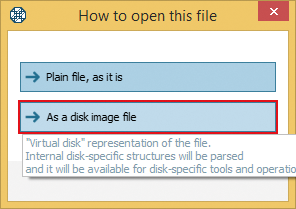
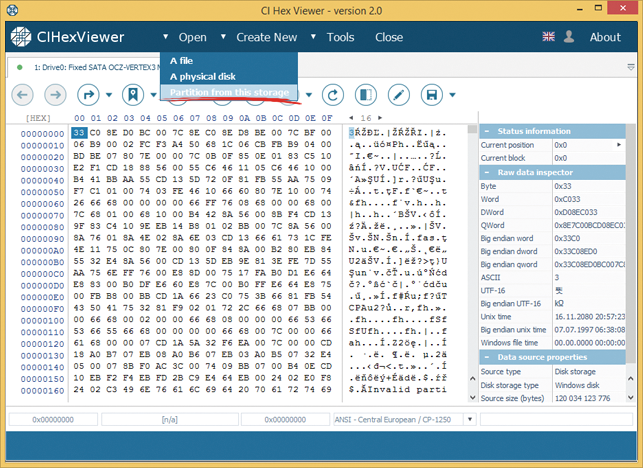
To open a partition from the disk already available in the program, select Partition from this storage from the drop-down list.

The structure of the NTFS boot sector is as follows:
Offset |
Field length |
Field name |
0x0 |
3 |
Jump instruction to bootstrap code |
0x03 |
8 |
ID |
0x0B |
25 |
Bios Parameter Block (BPB) |
0x24 |
48 |
Extended BPB |
0x54 |
426 |
Bootstrap code |
0x01FE |
2 |
End of sector marker |
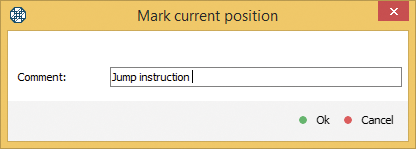
We mark data blocks of the boot sector in the program. To do this we select Mark position from the tool bar
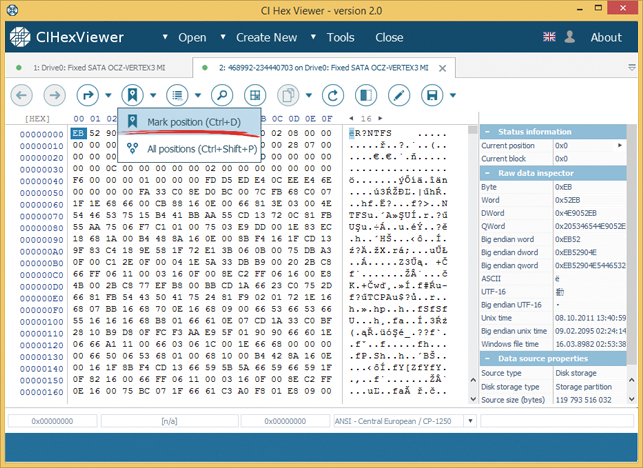
and save start positions of the data fields with our comments.
The program makes a list of all marked positions.
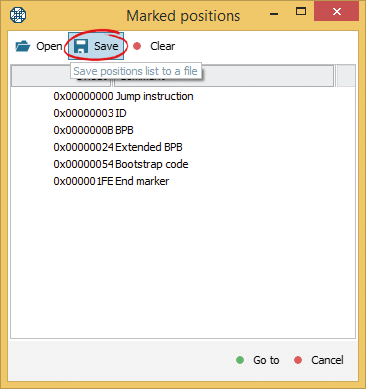
To use the structure for other partition analyses, we save the list into a file pressing Save. To load the saved list into the program press Open. Clear button will wipe the list from the file.

The BPB and the extended BPB are the most crucial part of the boot sector in respect to data recovery from an NTFS storage. These blocks contain essential information about the storage architecture and point to MFT including records about all files in the NTFS system. Generally, the BPB has the following structure:
Offset |
Field length |
Field name |
0x0B |
2 |
Bytes per sector |
0x0D |
1 |
Sectors per cluster |
0x0E |
2 |
Reserved sectors |
0x10 |
3 |
Always 0 |
0x13 |
2 |
Not used by NTFS |
0x15 |
1 |
Storage type |
0x16 |
2 |
Always 0 |
0x18 |
2 |
Sectors per track |
0x1A |
2 |
Number of heads |
0x1C |
4 |
Hidden sectors |
0x20 |
4 |
Not used by NTFS |
0x24 |
4 |
Not used by NTFS |
0x28 |
8 |
Number of sectors in the NTFS volume |
0x30 |
8 |
Start cluster of the MFT |
0x38 |
8 |
Start cluster of the MFT copy |
0x40 |
4 |
Clusters per MFT record |
0x44 |
4 |
Clusters per index record |
0x48 |
8 |
Unique serial number of the volume |
0x50 |
4 |
Checksum |
The BPB begins with offset 0x0B followed by the extended BPB from offset 0x24. In total, the BPB takes the data area from offset 0x0B to offset 0x53 (73 bytes). We go to the BPB start directly from the list of marked positions.

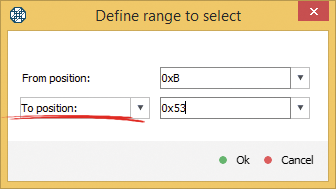
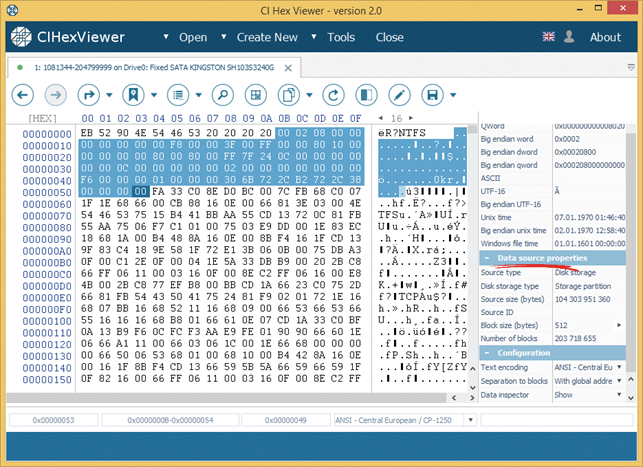
For easier observing, we highlight the BPB area. To do this we press Select range
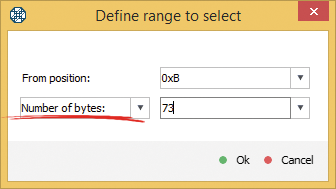
and mark the area entering the positions from 0x0B to 0x53
or the number of bytes – 73.

The information about the selected area is also reflected in the contextual line. In this line you can check the start, length and total size of the selected area. You can also convert hexadecimal view into decimal by pressing [DEC] on the top of the string address pane.
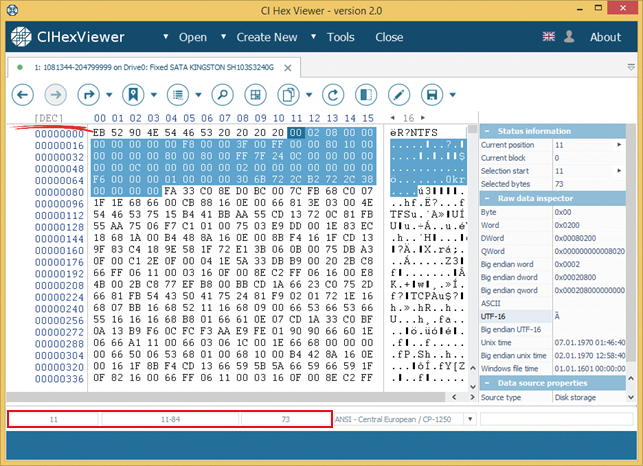
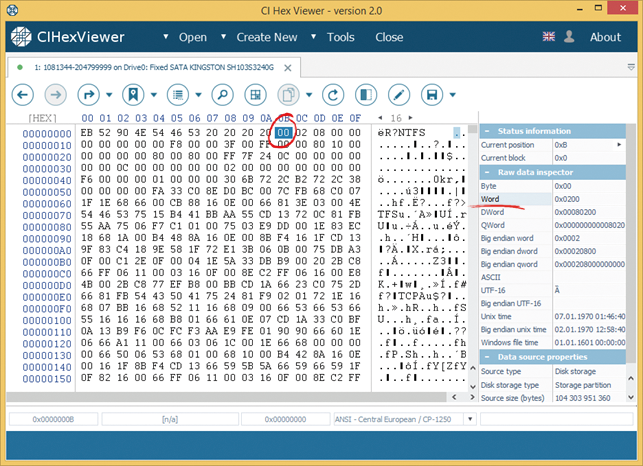
Values of the hexadecimal data fields are displayed in the raw data inspector. To have the data field displayed in the inspector we set the cursor at the field start and look for the corresponding field length in the inspector table. For example, we can find the value of the 2-byte field from position 0x0B – number of bytes per sector – in the string Word (2 bytes) – 0x0200.
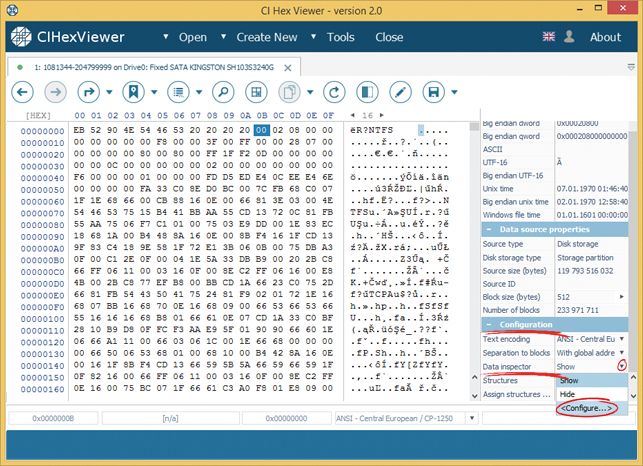
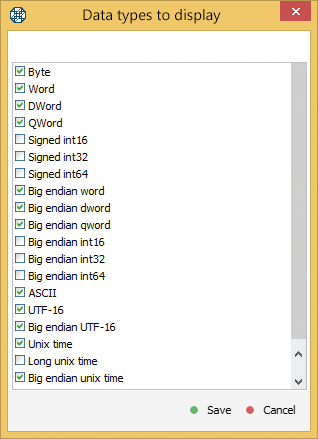
To add or exclude a data type from the raw data inspector go to Configuration, press Configure in the string for the raw data inspector and choose the necessary data type.
The BPB analysis on our NTFS partition gave the following results:
Offset |
Field length |
Field name |
Result |
0x0B |
2 |
Bytes per sector |
0x200 (512 bytes) |
0x0D |
1 |
Sectors per cluster |
0x08 (8 sectors) |
0x0E |
2 |
Reserved sectors |
0 (sectors) |
0x15 |
1 |
Storage type |
0xF8 (stands for disk storage) |
0x18 |
2 |
Sectors per track |
0x3F (63 sectors) |
0x1A |
2 |
Number of heads |
0xFF (255 heads) |
0x1C |
4 |
Hidden sectors |
0x1080 (4224 sectors) |
0x28 |
8 |
Number of sectors in the NTFS volume |
0x0C247FFF (203 718 655 sectors) |
0x30 |
8 |
Start cluster of the MFT |
0x0C0000 (cluster 786432) |
0x38 |
8 |
Start cluster of the MFT copy |
0x02 (cluster 2) |
0x40 |
4 |
Clusters per MFT record |
0xF6 (246 clusters) |
0x44 |
4 |
Clusters per index record |
0x01 (1 cluster) |
0x48 |
8 |
Unique serial number of the volume |
0x38 2C 72 B2 2C 72 6B 30 |
0x50 |
4 |
Checksum |
0x00 00 00 00 |
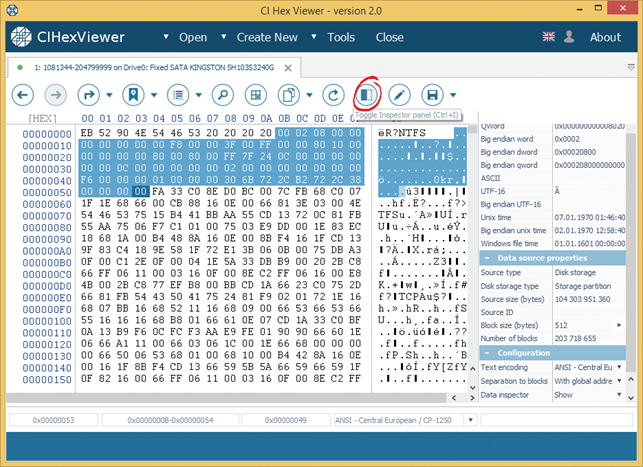
Using the information from the boot sector, the program makes a summary about the data storage. You can find the data source properties in the information pane.
You can hide the information panel pressing Toggle inspector panel.
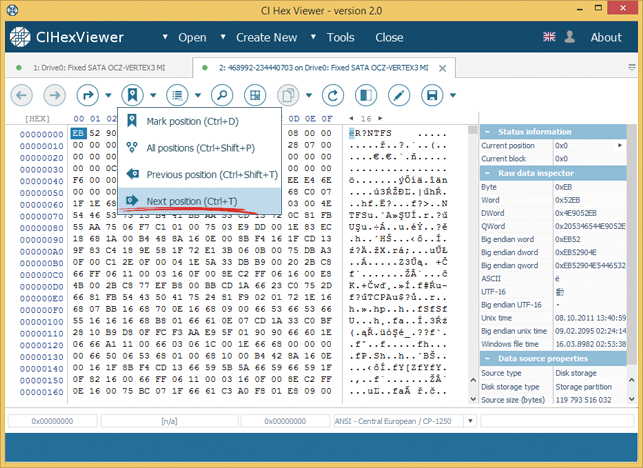
To confirm overall consistency of the boot sector we go to the end of sector marker. We can easily jump to the marker position using marked positions menu. We select Next position from the drop-down list and go over saved positions to the necessary one without any need to open the full list.
In the End of sector marker we find value AA 55 coinciding with the value of an intact boot sector.

The most important information for data recovery from NTFS is the information about MFT. To calculate the MFT position we need to know the start position of the MFT cluster, number of sectors per cluster and the number of bytes per sector. Our analysis shows that the MFT is located at cluster 786432. Besides, we have found out that each cluster consists of 8 sectors and each sector consists of 512 bytes. We multiply the MFT start cluster by the number of sectors per cluster that results in MFT start sector: 786432 x 8 = 6291456 (0x600000).
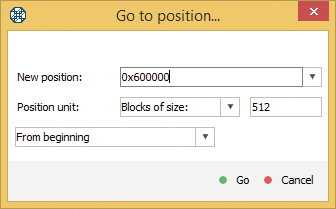
We set the cursor position on the start and jump to MFT start sector using the Go to button.

To jump to a new position, we enter position 0x600000, select Blocks of size 512 Bytes as a unit to calculate the new position location and the direction From beginning in the position change dialog.
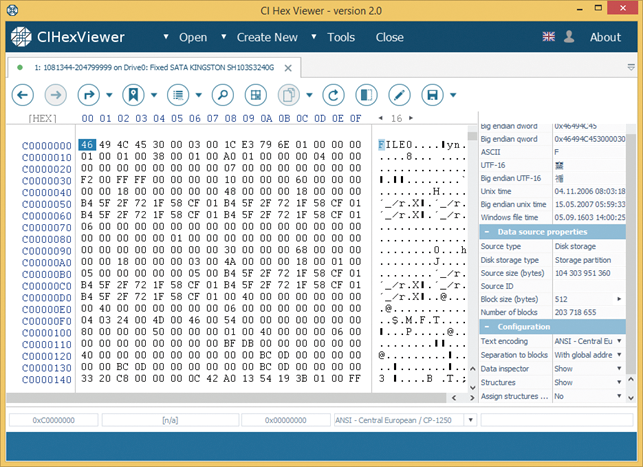
We can see the marks of MFT here: such as $M.F.T. in the textual pane.
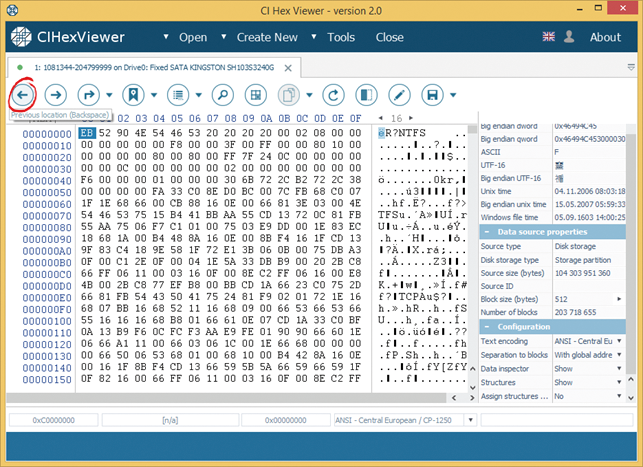
To go back to the partition start as a previous position we press Previous location.
Summary:
Boot sector analysis is the first step in the process of data recovery from a failed NTFS partition. In the example above we have analyzed the structure of the NTFS partition boot sector. Due to the conducted analysis, we have found the MFT location. Further data recovery results will depend greatly on the MFT condition.